Spring Time Chip Bag Templates: A Creator's Guide to Flawless Party Favors
There is a special kind of magic in creating your own party favors. The ability to design something unique, personal, and perfectly matched to your theme is incredibly satisfying. This is especially true for trendy and fun items like custom chip bag wrappers. With vibrant florals, pastel colors, and cheerful motifs, Spring Time Chip Bag Templates offer a fantastic shortcut for event planners, small business owners, and hobbyists looking to produce professional-quality results without starting from a blank canvas. They promise a quick, easy, and beautiful outcome for everything from baby showers to spring market stalls.
However, the path from a downloaded template to a perfectly assembled, vibrant chip bag is filled with potential pitfalls. Many first-time users—and even some experienced creators—make critical errors that lead to frustration, wasted materials, and a final product that looks amateurish. The issue often isn't the template itself, but a misunderstanding of the process. Let’s walk through the most common mistakes people make with these templates and, more importantly, how to sidestep them for a seamless and successful project.
The All-in-One Template Pack: Understanding What You're Getting
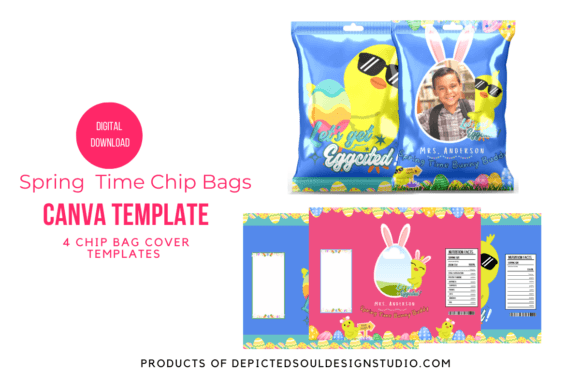
Before you even think about editing, you need to know exactly what's inside your purchase. A common frustration stems from buyers who expect a single, magical "click-and-print" file. A quality set of Spring Time Chip Bag Templates, however, is more nuanced. A typical pack might include:
- 4 Standard Templates (11x8.5 inches): These are your foundational designs. They are often "flattened" or "locked" for ease of use, meaning the main graphic elements and layout are fixed, but you can still customize the text.
- 2 Drag-and-Drop Templates: These are a game-changer for personalization. They feature designated image placeholders where you can easily drag and drop your own photos—perfect for adding a picture of the birthday child, a company logo, or a product image.
- 2 Editable Nutrition Facts Templates: This is a detail many overlook. If you are a small business selling snacks, having a professional-looking, editable nutrition label is not just a nice touch; it's a mark of credibility. These templates allow you to input your specific product information.
Failing to recognize the purpose of each file type is the first mistake. Don't try to use a standard template for a photo-centric design, and don't expect a drag-and-drop template to have every element fully editable. Using the right file for the right job is the first step toward efficiency.
Avoiding the Editing Traps in Canva
The beauty of these templates is their integration with Canva, a free and user-friendly design platform. But "user-friendly" doesn't mean "foolproof." Here’s where many users stumble.
Mistake: Ignoring the Basics of Text and Font Editing
People often rush in, delete the placeholder text, and start typing without a second thought. This can break the entire design's aesthetic. A Spring Time Chip Bag Template is carefully balanced. The original font choice, size, and color were selected to complement the spring-themed graphics. Simply slapping on a different, mismatched font can make the entire design look disjointed and cheap.
The Better Approach: Before you change anything, analyze the existing design. Why was that cursive font used for the main title? Why is the event details text in a clean, sans-serif font? When you do change the text, start by using the provided font and color palette. Canva makes it easy to alter the font color—just click the text, then the color swatch at the top. Stick to the template's color scheme initially to maintain a cohesive, professional look. Only venture outside the palette if you have a strong design reason to do so.
Mistake: Low-Resolution Image Disasters
This is perhaps the most common and heartbreaking error. A user creates a beautiful design in Canva, prints it out, and the images they added are blurry, pixelated, or distorted. This happens when you use a low-resolution image, especially in the drag-and-drop templates designed for photos.
The Better Approach: Always use high-resolution images. As a rule of thumb, aim for images that are at least 300 DPI (dots per inch) for print. In practical terms, this means using the original file from your camera or phone, not a compressed version you downloaded from social media. When you drag your image into the Canva template, use the corner handles to resize it while holding the Shift key. This constrains the proportions and prevents the stretched, distorted look that screams "amateur."
From Screen to Print: The Final, Crucial Steps
You’ve designed a masterpiece on your screen. The colors are poppin’, the text is crisp, and the layout is perfect. But the job is only half done. The transition from a digital file to a physical product is where the final set of mistakes occurs.
Overlooking the Color and Print Reality Check
This is a vital piece of advice that will save you immense disappointment. Colors will look different on your screen than they do when printed. Your monitor emits light (RGB color model), while your printer uses ink on paper (CMYK color model). Bright, neon-like pinks and greens on your screen can appear duller or different in print. This isn't a flaw in the template; it's the nature of printing.
The Better Approach: Never print a large batch without doing a test print first. Use one sheet of the exact paper you plan to use for your final project. This allows you to check for color accuracy, sharpness, and how the ink interacts with the paper's finish (matte vs. glossy). This small, upfront cost of one sheet of paper and a bit of ink can save you from wasting an entire pack of expensive cardstock.
Forgetting the Fine Print: Terms of Use
In your excitement, it's easy to click "I agree" without reading. But for digital templates, the Terms of Use are critical. A common misunderstanding is that buying a template gives you ownership of the design. It doesn't. Your purchase grants you a license to use the files.
Specifically, with these templates, you are typically granted the right to use them for personal and/or business purposes. This means you can create and sell the finished, physical chip bags. However, you MAY NOT share the editable Canva template links with others. You also MAY NOT resell, copy, or redistribute the digital template files as your own product. Violating these terms is not only unethical but can also lead to your shop being shut down on platforms like Etsy. Understand the license you are purchasing to protect yourself and respect the original creator's work.
Your Checklist for a Perfect Project
Before you dive into your next spring-themed party favor project, run through this quick checklist. It will ensure you avoid the common frustrations and achieve the beautiful, professional results you envision.
- Inspect Your Purchase: Open the PDF and click the links. Familiarize yourself with the different template types (standard, drag-and-drop, nutrition facts) and their intended uses.
- Use Canva Strategically: Log in to your free Canva account. Before changing fonts or colors, appreciate the existing design. Make thoughtful, intentional edits.
- Source High-Quality Images: If you're using your own photos, ensure they are high-resolution. Avoid blurry or pixelated images at all costs.
- Perform a Test Print: This is non-negotiable. Print one copy on your chosen paper to check for color accuracy and print quality before committing to a full batch.
- Read and Respect the Terms: Understand that you can sell the finished physical product but cannot share or resell the digital template files.
By treating your Spring Time Chip Bag Templates